As springtime turns to early summer, blue skies, warmer temperatures (albeit with surprise snow sprinkles here and there), and budding green beckons the picnic basket. Picnics call for deviled eggs, without question. I know those special dishes with the perfectly egg-shaped indentations (Debbie, yours is particularly lovely) are just waiting to be filled with deliciousness.
When I was at cooking school, the Thursday Lunch Buffet was an extravaganza attended by many, many “regulars”, because it was the best deal in town. There was an unbelievable array of hot and cold foods, prepared by all the day-time students. The Cold Foods chefs-in-training worked all week on aspic-covered or layered, beautifully decorated treats, displayed on vinegar-polished mirrors, to tempt the palates of a room full of eager diners. We made ice sculptures, and fat sculptures to enhance the display. It was a time to learn skills from culinary history, transferrable to modern food presentation. I had more fun with gelatin than I had dreamed possible.
Deviled eggs, though, were a bit of a problem. As my mentor, Chef Sabrina delBen, will tell you, I don’t pipe (in spite of her efforts to improve my skills). Not only was it a challenge to perfectly peel the eggs (they were always too fresh), but those uniform ruffled or spiraled fillings, flowing effortlessly from a star-tipped piping bag, never appeared for me. I could make very tasty fillings – but every egg had its own size, shape, and personality.
The following recipe is my solution: pile everything into the food processor, and spread it on a cracker. Make a little, make a lot – it’s up to you. I usually start with two hard-boiled eggs, which makes enough spread for two or three lunches, or enough hors d’oeuvres for a small party. One egg is never enough.
Deviled Egg Spread
It’s the mustard that makes it “deviled”. You know my rules – there are none! Vary the ingredients to suit your palate or the contents of your fridge.
Ingredients:
2 hard-boiled eggs, roughly chopped
¼ cup diced ham (or smoked chicken or turkey, even salami – about 3 slices of deli meat)
¼ cup shredded cheese (Cheddar is nice with ham, but any cheese you like is fine)
¼ cup mayonnaise (or 2 Tbsp mayo plus 2 Tbsp Greek Yogurt)
1 tsp mustard (any kind, more to taste if you like)
Salt and (White) Pepper to taste
1/8 tsp cayenne
2 Tbsp fresh chives, if you have them those harbingers of spring (parsley will work, as will green onion tops)

Method:
Pile everything except whatever green garnish you choose into the food processor, and process until very smooth.

Add the finely chopped green of choice by hand.

Spread on whatever you want to eat – a cracker, a cucumber or zucchini slice, a stick of celery, a wedge of pita bread.
Ta-da! All of the flavor, and none of the fuss.
If you choose those little Siljans cups, fill them just before eating – they tend to get soggy pretty quickly.
A garnishing sprinkle of paprika is traditional. I tend to use smoked paprika these days because I love it. I’m also currently using no-salt Montreal Steak Spice on pretty much everything I can think of, which I will continue to do until I get tired of it. You can garnish with anything from a truffle shaving to a radish slice, depending on what’s in your fridge.
The spread will keep in a covered container in the fridge for a couple of days, but like any egg/mayonnaise mixture, make just what you need and plan to use it up quickly. Hard boiled eggs will keep in their shells for a week in the fridge, but once they’re peeled, treat them as very perishable. That means do not leave your prepared hors d’ouvres or sandwiches at room temperature for more than an hour before you eat them, or there might just be consequences you won’t enjoy.

Avocado variation: If you don’t mind a green spread, and you’re going to consume it in one sitting, you can replace the mayonnaise with half an avocado, or you can just add half an avocado to the whole mix. Make it à la minute, and invite a friend over for lunch, as the spread turns an unappealing grey color when stored in the fridge, even if you cover the surface with plastic wrap.
Deviled Egg Spread makes a great sandwich filling, green or not.

Proper Deviled Eggs
If your heart is set on real deviled eggs, you can search on-line for the perfect method for hard-boiling the eggs, and shake your head over the research. Here’s the easiest way I know to get “easy-peel” eggs, without grey rings around the yolks. These instructions apply to Calgary altitude – my water boils at a lower temperature than Vancouver water.
Choose older eggs. I buy mine at least a week ahead, and sometimes two. Older eggs do not have the membrane under the shell so tightly bonded to the egg white.
If you want perfectly centered yolks, apparently you can vigorously shake the eggs to get that to happen, possibly shifting the air pocket in the process. Forget it. Go with what you get.

Place cold eggs in a saucepan large enough to hold them in a single layer. Fill the saucepan with cold water, covering the eggs by at least 2 inches.
Bring the eggs and water to a full, rolling boil. Cover the pot to hasten the process.
When the water is boiling, turn off the heat. Leave the cover on the pot. Let the eggs sit for 8 minutes for medium-sized eggs, 9 minutes for extra-large eggs, 10 minutes for jumbo eggs. In my opinion, medium-sized eggs make the best deviled eggs – one big bite (or 2 daintier ones).
Pour off the hot water, and fill the pot with the coldest tap water you can get. I keep running the cold water into the pot in the sink until the pot itself is cold.
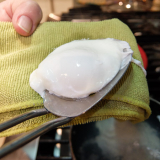
Start to peel the eggs right away. They peel more easily when the shells are cold, but the insides are still warm. Crack the shell all over, and start from the big end, where the air pocket usually is. If you can perform this with the eggs under water, you’ll have better success. Peel gently, separating the shell and underlying membrane from the egg white. It can help to use a small, flattish spoon to get the job done quickly (Mica taught me this). This is especially helpful if your eggs were quite fresh, and the whites are peeling off with the shells – soooo frustrating.
Cool the eggs completely in the refrigerator before slicing them in half to remove the yolks – the whites will be firmer when cold. If you want to avoid one-side-flat eggs, submerge the peeled eggs in a container full of cold water. This is a short-term storage situation; plan to use those eggs within a day.

When deviled egg time arrives, separate the yolks from the whites and mash them up with at least mayonnaise, mustard, salt and pepper. You can add a teaspoon of cream cheese per yolk for a nicely textured filling, and you can incorporate finely minced protein, such as bacon, ham or shrimp. Refill the whites using a pastry bag or a small spoon, and garnish creatively. Plan to eat those deviled eggs as soon as possible, and keep them cold until you do – that means use a freezer block in your picnic cooler, please.
…but…
These are so much easier, and just as pretty and tasty. Don’t you have other things to do with your time? I know I do!







Leave A Comment