


Ever since my local grocery started carrying plain naan in packages of 8, I have been using them as my instant pizza base, my preferred accompaniment to saucy foods like butter chicken, and my bun replacement for a hearty dinner sandwich, grilled or not. Naan’s chewy texture makes it a treat worth working with.
I hadn’t made naan myself since cooking school. Previous experimentation with pitas and tortillas has led me to believe that all the fuss isn’t worth it – the prepared products are better, and WAY more convenient. Whatever their additives are, the end result is more pliable, stays fresh longer, and buying pre-made keeps my kitchen clean.
When I spotted “mini-naan” in the grocery, though, it got me thinking that maybe home-made offered an option worth pursuing – size. If I could exercise portion control right at the origin, maybe I could make naan into a multitasker I could use more often. I figure one store-bought naan is probably about the same as four slices of bread, which certainly needs to be factored into its consumption. And of course, I’m always up for a challenge.
Sadly, I don’t own a tandoor. Back in cooking school, I tried an oven-baked method, and a stove-top method. The stove-top won, and that’s the method I’m recommending. I do think you could put your pizza stone in your barbecue, fire it up as hot as it will go, and bake off your naan with great success. I don’t wish to make my own life that exciting, however, so I’ll leave the experimentation to you.
Naan
Ingredients
- 1 ½ teaspoons dry yeast (instant gives a faster rise, but traditional will work too)
- 2 teaspoons sugar
- ¾ cup warm water
- 2 cups all-purpose flour
- 1 tsp salt (or 1 ½ tsp kosher salt – it takes up more space)
- ¼ tsp baking powder
- 3 Tablespoons plain yoghurt
- 2 Tablespoons butter, melted, for the dough, and extra for brushing the finished naan
(Garlic naan is brushed with garlic butter, or buttered and sprinkled with very finely chopped garlic. There’s no reason you couldn’t add a little garlic right into the dough, whether microplane grated or powdered. Naturally, I added a good shake of my favorite no-salt herb/garlic product. Yummy!)


What about that yoghurt, eh? Why is it there at all? One of the recipes I found used ONLY yoghurt as its wet ingredient. Milk products enrich and tenderize bread dough, so if you leave the yoghurt out, you run the risk of producing naan that are drier in texture and tougher than you might have wanted. Sour cream would probably work in a pinch. You could substitute plain old milk, but use less (2 Tablespoons, maybe?) because it contains more water than yogurt. You could probably use 3 Tablespoons of powdered milk and a Tablespoon of water; the same with buttermilk powder. Or you could leave it out altogether, at your peril. Don’t use fruity yogurt or vanilla yogurt — you’ll mess up the flavor profile.
The butter is there for the same reason. If you have it on hand, ghee (lightly browned clarified butter) would be a perfect choice of fat, but really, any fat will do. Any kind of vegetable oil, including coconut oil, would work just as well. Don’t use easy-spread margarine, as it contains too much water. I chose butter because I like the flavor.
And for my gluten-free friends – sorry. I tried a straight swap of my gluten-free flour blend and xanthan gum for the all-purpose flour, and had no success at all. I would suggest you go online, source out some of the excellent recipes for gluten-free flatbreads, and choose one.
Method
Dissolve sugar and yeast in warm water and set aside. If it doesn’t bubble within about 5 minutes, the yeast is dead. Buy more and start again.


In a bowl big enough to mix things by hand, combine the flour, salt and baking powder. Pour in the yeast mixture, and add the yogurt and melted butter. Mix everything together, first with a spoon and then by hand. When the dough comes together, turn it out onto the counter and knead it a little until it is homogenous, but not as much as you would if you were making loaf bread. You will notice it’s very soft and sticky, so kneading would be problematic anyway. That’s on purpose. Don’t panic. Gather it up into a ball, and place it in a buttered bowl big enough so it can double in size. Cover with plastic wrap, and find something else to do for half an hour or so.


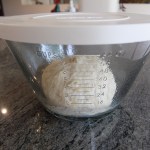
Alternatively, if you’re as lazy as I am, put all your ingredients except the yeast mixture into your food processor (starting with the dry ingredients) and give everything a couple of pulses to get things going. With the machine running, pour in the yeast mixture. Stop as soon as the dough forms a ball, which will be almost immediately. Turn the dough ball into a greased bowl, cover, and let rise, as described above.


Turn your lovely risen dough out onto a lightly floured counter, and pat it down into a circle, knocking out any really big bubbles. You want to leave the smaller bubbles in place, as the dough isn’t going to get a second rising. This is a flatbread, but it’s not a cracker, so be gentle with your dough.
Cut the circle into 6 or 8 equal pieces – it depends on how big you want your naans to be at the end of the day. I have done 6, each of which makes a generous serving. I’m showing 8. Each will still weigh the same as 2 slices of bread at least. Just something to consider. Roll each portion into a ball, cover with plastic wrap and let rest while you heat up your pan.


Using as little extra flour as possible, roll each bun into a nice thin circle, just a little thinner than ¼ inch (I know my photo looks thicker, but really, they were quite thin). The dough is quite springy, so let it rest before you release it from the countertop. I floured my countertop very lightly, and sprinkled a little flour on top of the very sticky dough to prevent the rolling pin from sticking. I patted the dough into a circle, giving it a quarter turn twice before applying the rolling pin, and I made every attempt to keep my circles nice and round. For one batch I rolled all the circles before beginning to cook. For another, I rolled the next circle while the previous one was cooking. Rolling all the circles at once is a better strategy, as cooking time is very quick. Cover the rolled circles with plastic to keep them from drying out.


Preheat a thick-bottomed frying pan over medium high heat until it’s very hot, at least 5 minutes. Water droplets flicked into the pan will evaporate immediately – they won’t even stop to dance. If you have an old cast iron skillet, it may even start to smoke a little. DON’T ADD OIL – this is a dry-fry method. Have a lid, or a pizza pan, nearby.
Gently lay one circle of dough into the pan. Cook for about 1 minute (check – if it’s burning, flip it and turn down the heat a little). When nicely browned, flip the circle over and cover the pan to help the dough cook through. Cook for another 30 seconds to a minute. When it’s nicely browned and puffy, it’s done. Keep checking while you’re cooking – you may need to sacrifice your first naan in order to find your perfect combination of pan and heat setting. If you’re cooking over a gas flame or an induction burner, this will be easy; if you’re using plain old electric, it will be more of a challenge, as it takes the element longer to heat up and cool down. Better to use a slightly lower heat and a longer cooking time, than a higher heat than your pan can handle – your naan will burn before they cook through. If you have to use a lower heat for the sake of your pan, you won’t get as much bubbling and puffing as you will with higher heat. It’s all a balancing act.
Brush each finished naan with butter right when it comes out of the pan.
I got a little concerned about the size of the bubbles my naan were producing, wondering if this might be preventing them from cooking through. I poked holes in a couple with a fork to prevent them from puffing up, and that was somewhat successful in producing a flatter end product. I needn’t have worried — they cooked through either way.


If you’re having a party, stack them up and keep them wrapped in a tea towel. If you’re making a freezer supply, let them cool on a rack, then bag and freeze.

… and finally, why you need to get a cast iron frying pan.
Your best bet for good results with naan-making and many other tasks, is a frying pan with a thick, heavy bottom. Any pan, non-stick or not, whether it’s cheap or marketed by a celebrity, just won’t take the heat if the bottom is thin. If you find your food is burning on the surface before it can cook through, it may not you or your stove — it’s your pan. Unless you’re a trained chef with lots of experience using blue steel, you need a different choice.
I used my mother’s cast iron frying pan and 3/4 maximum gas flame (I have pretty powerful burners) to start with, which worked a treat. I did have to lower the heat to half by about the fifth naan. I also tried my Professional Series T-fal non-stick pan, which has a heavier bottom than their other models, using just a hair more than 1/2 maximum heat, and it performed well. If you own a heavy, ridged grill pan, that will work (I’ve seen pictures with some recipes), and if you own a flat heavy griddle plate (the kind that goes over two burners), that would work too. I haven’t tried an electric frying pan or griddle, because I don’t own either one. I wonder if this dough would waffle – just kidding!
If you don’t own a cast iron frying pan, you really should consider acquiring one. It’s not very expensive compared to designer cookware, and will last forever — that’s more environmentally friendly than any non-stick pan. A cheap non-stick pan will lose its surface within a year, and none of them can be heated above ¾ max without vaporizing the coating. Cast iron even comes pre-seasoned, so you don’t need to fuss with it much – just cook up some bacon from time to time, and keep it clean and dry. It will never be as slippery as nonstick, but you can’t find a better pan for browning meat, and you can put it in the oven without worrying if the handle will melt. Check out the Lodge Cast Iron site (click here) and prepare to spend a happy half hour trying to figure out which model can multitask best for you!
Those enamelled dutch ovens are mighty pretty when they’re new, but cast iron ages like George Clooney.


Leave A Comment