Once upon a time, my son Carter asked me if I would teach him to make my Shepherd’s Pie. Interesting, since I couldn’t ever recall making “real” Shepherd’s Pie, right along with never making meatloaf. Turns out what he was remembering was an excellent heritage dish from his Grammie that she called “Pirate Stew”. Her day-after-roast-beef dish involved a layer of ground cooked meat moistened with gravy, topped with a layer of leftover mashed potatoes, baked in a pie pan and served in wedges with lashings of leftover gravy. Memorable indeed! I don’t believe anything as exciting as a clove of garlic ever graced her cooking, but this was still comfort food at its best.
I had watched America’s Test Kitchen re-invent classic Shepherd’s Pie (well, their classic), improving it as only they could. Sometimes I think they keep tinkering right up to the point where it’s too much trouble to follow their “new and improved” method. On the other hand, sometimes they come up with some science that I just have to try myself. That’s why there is baking soda in this recipe. Apparently, altering the pH of the meat’s surface prevents it from becoming tough. I have never thought of broken-up ground beef as being “tough” by any measure, but there’s always something to learn. Sure enough, our trial of their method resulted in a tasty dish, and that’s the best indicator of success.
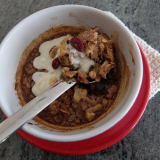
The most interesting extrapolation of this recipe has been the development of Carter’s “Breakfast Stew”. I wanted to call it “Meat Porridge”, but apparently that was a poor marketing choice. Carter has never been one for a traditional breakfast, opting instead for leftover-last-night. In his occupation as a sea kayak guide, where leftovers only attract bears, and breakfast is most often the loathed oatmeal, we needed to come up with a portable alternative. Fortunately, the meat and veg part of the Shepherd’s Pie dehydrates very well, and rehydrates for morning feasting quite easily. We have tried many flavor variations with great success, and we add pot barley to compensate for the lack of mashed potato. I ship him quantities at the beginning of his season — it keeps well in an airtight bag for about 6 months.
Meanwhile, here is a good starting recipe for Shepherd’s Pie. I fully expect you to add your own touches as you go along. I have given you the measurements for a smallish batch, but it’s really easy to double and make enough for the whole winter. Single servings can be stored frozen for at least 2 months.
Shepherd’s Pie
“True” Shepherd’s Pie is made with lamb, leftover cooked lamb to be precise. When made with beef, it is called “Cottage Pie”. Potayto, potahto. We have used beef, lean ground pork, turkey, and chicken, all with good success.
First, the Mashed Potatoes
- 1 1/2 cups mashed Russet or Yukon Gold Potatoes (sometimes I add starchy sweet potato)
- 1 egg yolk
- Chives and/or parsley, fresh or dried, for prettiness
I’m going to go against some perfectly sound kitchen science here, and return to my mother’s kitchen. All modern references will say you must ABSOLUTELY NOT mash your potatoes with a hand-mixer or a food processor, or they will turn to glue. While I agree about the food processor, I’m here to tell you that my mother mashed her potatoes with a hand-mixer all her life. No ricer for her. She simply made sure she chose the right kind of potato (russets), cut them up fairly small, and cooked them until they were very soft. She heated the milk and melted the butter right there in the pot, then gave them a buzz with the mixer for about 30 seconds for beautifully whipped potatoes every time. Really! NEVER gluey.
Stir your chives or parsley into the beautifully whipped potatoes.
Add a bit of warm mashed potatoes to the egg yolks to keep them from scrambling in the big hot pot, then stir the egg into the potatoes. This will make the potato topping lovely and firm on your finished Shepherd’s Pie, which is a thing of beauty. Set it aside while you put the meat part together. The piping bag is optional — sometimes I like to show off.


And now, on to the meat.
- 1 pound or 450gm ground beef (or chicken, turkey, pork, lamb)
- 1 Tbsp water
- 1/2 tsp baking soda
- 1 – 2 Tbsp vegetable oil
- 1/2 cup finely chopped onion or shallot (or 1 cup thinly sliced leeks if onions are difficult for you to digest in a socially acceptable manner)
- 1 cup finely chopped mushrooms, any kind
- 1 clove garlic, finely minced (use your microplane grater)
- 1 Tbsp tomato paste (freeze the leftover in an ice cube tray)
- 1 Tbsp all purpose flour, or rice flour
- 3/4 cup beef broth (or chicken broth if appropriate)
- 1 Tbsp Soy Sauce, or to taste
- 1 1/2 tsp Worcestershire Sauce, or to taste
- 1/2 cup small-diced carrot, more or less
- 1/2 cup frozen vegetables, any kind you like (Carter likes corn and peas)
In a bowl, break up the ground beef a little. Sprinkle it with the water and baking soda, and a little salt and pepper. Toss it about by hand so everything gets evenly distributed. Move it into the fridge until you’re ready to cook it. Yes, you could dissolve the baking soda in the water, but I just sprinkle it on like the salt.


And now, the veg. In a nice big skillet, sweat the mushrooms and onion in the oil over medium heat until everything is soft, but not browned, 3 to 5 minutes. Your mushrooms may give off a bit of moisture, but it will mostly evaporate as you continue cooking. Season with a little salt and pepper.
Add the garlic and tomato paste. Keep cooking until the tomato paste darkens from its original vivid red. This will make your finished mixture taste delicious, not at all like spaghetti sauce.
If you are using flour, stir it in and cook it for a minute or two. If you are using rice flour, just sprinkle, and stir it in.
Add the beef broth, soy sauce and Worchestershire sauce. Stir everything together and bring it to a simmer. It will start to thicken.
Add the carrots. Fresh carrots are preferred. I think frozen carrots are particularly nasty, and we found they did not reconstitute from dehydrating at all well.


Add the beef in clumps at this point. Put on the lid and let everything simmer for about 10 minutes. Then, use a couple of forks to break up the clumps of beef, until you achieve a texture you think you will like – some folks like their filling chunkier than others.


Continue cooking the meat mixture uncovered until the hamburger is fully cooked (no longer pink). At this point you can decide on additional seasoning. Taste it first, and add salt and pepper, soy sauce or Worcestershire as required. I added a generous sprinkling of Montreal Steak Spice, because I like that hint of dill. You can add anything you like, such as hot sauce or truffle oil (be really careful here – a little goes a long way). A splash of balsamic vinegar would be lovely.
If you think the filling is too runny, now is the time to thicken it up with either rice flour or corn starch. In either case, make up a slurry of equal parts starch and water. Add it to the meat mixture by the teaspoon-ful, stirring well and simmering a little after each addition. Keep going until the filling is almost as thick as you want it to be. It will continue to thicken as time goes by, so stop just short of perfection.
Choose rice flour if you’re planning to freeze your surplus. Cornstarch thickening doesn’t survive the freeze/thaw cycle very well. Wheat flour and rice flour thickening does.
Frozen vegetables do not need to be “cooked” – they only need to be heated, so add them last. Just stir them in.


Turn your meat mixture into the vessel of your choice. Although this is called Shepherd’s “Pie”, most pie plates are simply too shallow. You want a nice casserole, or an 8 or 9-inch square pyrex baking dish for a double recipe. A loaf pan works well for a single recipe. If you have containers, you can made individual portions. Small foil pie-pans are a good choice, as are those small square or rectangular foil pans with the tidy tops.

Pipe, spoon or smooth the mashed potatoes on top of the meat filling. At this point, the filling is hot, and the potatoes are probably room temperature, so if you’re going to eat this for dinner, you’ll want to rethermalize. Don’t you just love that word?
Heat up the broiler. Broil your “pie” about 8 inches from the broiling element (not too close), until the potatoes are hot and nicely browned. The egg in the potatoes needs to cook in order to do its job firming them up, so be patient. Keep a close eye, as broilers may”over-carbonize” (ok, burn) those spuds if not closely monitored.
You can broil off all your single-servings, or you can freeze them before broiling, knowing the potatoes will fully cook as you reheat your dinner, either in the toaster oven or the microwave. You know not to put foil in the microwave, right? Use a soup bowl or a small casserole.


My leftovers set up very nicely in the refrigerator overnight, so I portioned them into containers for future consumption. Frozen leftovers reheat more evenly if thawed, so either remember to take your dinner out of the freezer the night before, or use the thawing instructions that came with your microwave (if you still have them), before you start blasting away with full power. If you don’t need a beautiful dinner, then just blast away, but use 1 to 2 minute intervals, and stir in between. It’ll look like dog food, but it will taste delicious!





Leave A Comment