


Some recipes have perfect harmony, like lemon meringue pie – the filling needs two egg yolks, and the meringue needs two egg whites. Others do not, and as I am not a big consumer of the oh-so-popular egg-white omelette (why bother, really), here is a recipe to use up those egg whites that were left over from the Cookie Brittle recipe or the Ricotta Gnocchi recipe.
Meringue comes in many forms. French, Italian, Swiss – Google will describe them all for you. There is the soft, sticky kind that tops a meringue pie or features in the classic “Ile Flottante” (your mother’s “Floating Island”). There is wonderful Pavlova meringue – crispy on the outside but marshmallow-sticky on the inside. There are the light, nut-filled layers of a perfect Dacoise. And there is the perfectly white and crispy meringue, sometimes made into cookies, sometimes formed into little cups to hold some kind of delicious filling. We’re only going to look at the crispy kind of meringue in this posting. Each kind needs a different sugar-to-egg white ratio, and a different cooking time and temperature, and that’s all I’m sayin’ for now.
Crispy meringues are infinitely variable – they can be plain or fancy, elegant or rustic, refined or funky depending on what you want them for. I started making them when my kids were swooning at the bakery counter over brightly-colored piped confections, and I knew I could make them at home for a fraction of the cost. My Mom used to make them with cornflakes folded in, which made them breakfast food (just like Rice Krispie squares – they’re made of cereal, right?).

Crispy Meringue (for Cookies, Kisses, or Nests)
Crispy meringues will keep in an air-tight container in a dark, cool, dry place (not the fridge — it’s wet) for quite a long time, so on towards the end of November, you can make some for your gluten-free friends and parcel them up for Christmas giving, or to take to the cookie exchange with confidence that everyone will be pleased.

Ingredients:
This recipe can be doubled if you have more egg whites to use up, or you’re planning a show-stopper dessert for the book club.
- 2 large egg whites
- ½ tsp cream of tartar, or a few drops of lemon juice
- ½ cup berry or castor sugar (or granulated sugar — see the note below)
- Flavoring of choice (1 tsp vanilla, for example)
Just a reminder that room-temperature egg whites whip up bigger and better than cold ones. Also, if you have ANY yolk in those whites, or ANY grease in the bowl or on the beaters, you’re going to be sorry. They’ll whip up, but not to any great volume. The rule is: clean, dry bowl; clean dry beaters; room-temperature uncontaminated egg whites, as fresh as possible. By the way, those pasteurized egg whites in the dairy refrigerator case will do the job just fine.
Leave out the cream of tartar or lemon juice at your peril. It plays an important part in stabilizing the foam. Google it for the food chemistry, if you’re interested.
If you don’t keep berry sugar on hand (and who does, really), you can use plain granulated sugar that you have blitzed in your blender or (clean) coffee or spice grinder. Fine sugar dissolves more quickly than granulated sugar, so you don’t need to beat the meringue quite as long to get the job done. Icing sugar contains cornstarch, so please don’t use it for this recipe.


Method:
Have cookie sheets ready, lined with baking parchment. Parchment works better than a silpat-type liner. If you place the meringue directly onto an un-lined sheet, even if it’s non-stick, they will remain there until soaked off, which somewhat ruins the presentation. (Experience speaking.)
A deep bowl is a better choice than a shallow one. You can make meringue with a balloon whisk if you’re looking for a one-armed workout. I use a hand-held electric mixer for small batches, and a stand mixer with the whisk attachment for big batches. Neither an immersion blender nor food processor will work, unless the food processor has a whisking attachment.
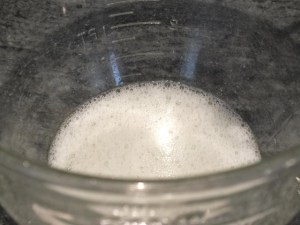
Beat the egg whites until foamy (this takes seconds).
Add cream of tartar or lemon juice and continue beating until a soft peak will hold and they are fluffy (this takes less than a minute), but not until they are stiff, or (heaven forbid) start to break down into dry curds (at which point you would have to start over). Err on the soft side.

Sprinkle in the sugar a tablespoon or two at a time while continuing to beat or whisk. It will take a couple of minutes to incorporate all the sugar. You’re not done beating yet. At this point you could add in the flavoring you have chosen.

Continue to beat or whisk until the meringue is shiny and holds its shape very well. Rub a little between your fingers – the sugar should be almost completely dissolved (this can take up to 5 minutes – don’t give up).


You may have already made a committment in terms of flavor by adding peppermint extract rather than vanilla, for example. Once the meringue is shiny and firm, you can fold in all manner of things. There are also a number of choices for forming the meringue into kisses, cookies, or nests, which will be outlined below. Before we go into all that detail, here’s how you’re going to bake your meringues.
- Baking Option #1: Preheat the oven to 350°F. Place the baking sheets in the oven, close the door and turn off the heat. Walk away for at least 2 hours, and as many as 12. Little kisses bake up faster than bigger nests. These are often called “Forgotten Cookies” because of this cooking method. There should be very little browning, if any.
- Baking Option #2: Preheat the oven to 200°F. Bake the meringues for 2 to 3 hours (depending on their size), or until you can easily peel one off the parchment or silpat and they seem quite dry throughout. Turn off the heat and prop open the oven door (a wooden spoon is always mentioned for this in the source recipes – I guess they just want to remind you not to use anything that might melt in the residual heat, or something that might damage the finish of your oven door) and leave the meringues to dry for a couple more hours (“forgotten” again).
Note: If you happen to be craving meringues on a particularly humid day, try to distract yourself, or make another choice. Water is the enemy of meringue, whether it’s in the air, in a filling, in the mixing bowl, or on the counter where you set them down.
Flavor Choices:
You can use any flavoring that crosses your mind. Some people like to seek out clear vanilla extract so their meringues are perfectly white. If you’re going to use this recipe to make nests, you can use brandy, almond, or coconut extract, or anything that will enhance your proposed filling. I would use an extract rather than something like juice or liqueur – you need less of it to get the flavor you’re seeking,and don’t risk ruining the texture of your meringue. Citrus zest works well.
You can fold a couple of tablespoons of unsweetened cocoa powder into the meringue to make “cocoa kisses”. Adding any more than that starts to affect the texture, so if you were wanting to make actual chocolate-flavored meringue, you might want to Google up a specific recipe to get the ratio just right.
You can use regular food coloring or paste food coloring along with the flavoring. The liquid kind will make nice pastels; the paste kind, available at craft stores, will give more intense color. Little piped meringues make excellent decorations for celebration cakes. You can put two colors into your piping bag (one down each side) and make swirlies. Just remember that red and green make brown — so work fast and clean, and know that the last few are NOT going to be as beautiful as the first few.
Kids love meringues flavored with Kool Aid (the unsweetened kind). Beat in a package before you shape or pipe it. Kool Aid meringues take longer to set up and dry out, so use the 200°F baking method and be prepared to leave them there for 5 hours or so. They taste like sour candies, which make them
an excellent choice for birthday parties, especially for little boys (I only had little boys). You can, of course, make the flavor less intense by using less Kool Aid powder. The meringues pictured are orange and cherry, and they were a big hit.

These could be any flavor you could imagine — vanilla, peppermint, anise, or you could add a few drops of coloring for lemon, orange, cherry, coffee.


Texture Choices:
You can fold up to 2 cups of finely chopped solid stuff into your meringue to make them more like a cookie. Many recipes call for 1 cup of mini-chocolate chips or finely chopped chocolate, and 1 cup of some kind of toasted, chopped, sliced or flaked nuts. As I mentioned before, crushed cereal works very well – you’d be surprised how tasty crushed bran flakes and a bit of cinnamon can be. Coconut is often very moist, so if you want a crispy meringue cookie, use the finely ground kind and toast it to make it as dry as possible.
You can sandwich two little meringues together with a bit of chocolate or icing for a pretty presentation. This isn’t the same kind of meringue a classic French “macaron” though – they have ground almonds in them, and are much fussier to make. This recipe is pretty close to the meringue in a Dacoise, though, so sandwich cookies are not out of the question.
Crispy meringues are particularly good for decorating with sprinkles or colored sugar, as the oven temperature won’t affect the color or texture, and the meringue is stiff enough that they won’t sink in. That makes them perfect holiday celebration fare. One year I made orange Kool Aid flavored ones with chocolate sprinkles for Halloween – they were a big hit. At Christmas time, use peppermint extract and sprinkle with crushed candy canes. Meringues can be dipped in or drizzled with melted chocolate too, if you like ( …hmmmm – cherry flavored, dipped in chocolate… ).


Shaping Choices:
You can make little kisses with two teaspoons, one for determining the size of the meringue, and the other to push it off the first spoon.
You can use a portion scoop (which is exactly like an ice-cream scoop), if you have a small one. This is particularly useful if you fold stuff into the meringue – it doesn’t pipe very well unless you chop the add-ins very finely.
If you use a regular-sized ice-cream scoop, the meringues will be quite a lot bigger than a cookie or a kiss, but the perfect size for making nests: Portion the meringue out with the scoop, and then make an indentation in the middle with a spoon. You can fill them with anything you like, as long as you don’t fill them too long before serving. Anything wet will dissolve the sugar in the meringue if left too long, and they’ll lose their lovely texture. Lemon curd is a classic filling for an Easter treat. A nest can make an elegant serving vessel for ice cream or gelato. They’re a good gluten-free alternative for strawberry “shortcake” – fill with sliced strawberries and top with whipped cream. At Christmas time, you can fill them with leftover cranberry sauce.
You can use a piping bag. I like to use a star tip, but you can go as plain or fancy as you like. You can even put the meringue in a zip-closure bag, cut off the corner, and pipe them that way – instant clean-up. Nests can be piped too. If you’re crazy for uniform size, draw circles on one side of the parchment paper, flip it over, and use those circles to guide your piping.


One basic recipe, a million variations. Use up leftover egg whites for an everyday treat, or create a masterpiece and use the leftover yolks for super-charged egg salad.
Let loose your inner baker!


Leave A Comment