


My dear friend Vicki’s most common reaction to just about anything I’m trying to develop from scratch is, “Why on earth would you want to go to all that trouble, when you can just go to the store and buy it already made?” This from a woman who keeps sourdough starter in her fridge, and who made cheese buns with it for her workmates practically every week of her working life. Why indeed!
I spent three weeks trying again, and again, and again to make a 2-unit batch of cinnamon sticky buns. I wanted a small-batch recipe with a gooey caramel bottom, something I could start sometime in the morning, sure in the knowledge that they would be ready to burn my mouth when afternoon tea-time rolled around. Not so many that I would have to freeze the leftovers, eat more than was good for me, or find a friend.
Recipe development is always an adventure. The first dough I made was too sticky, even after refrigeration. While I managed to roll and tie it into knots, it never rose particularly well, and was very dense. While the buns were edible, I didn’t like the simple brown sugar and butter approach to the caramel bottoms. I may be picky, but the fellow who gave me a ride back to the car shop didn’t seem to mind.
Tweaking the ratio a little, the second batch was a little too stiff. It could be formed into snails, so I gave that a try. My trial batch made too much dough for the Texas muffin pans I thought would be perfect for the job. At the end of the experiment, I wasn’t very happy with either the shape or the consistency of the buns. The plumber got the extras from that batch.
I learned, as I worked my way through the next couple of batches, that a small-yield recipe requires very exacting measurement. One batch thrned into batter bread on the day I used a jumbo egg yolk. There was just that much extra moisture, when combined with a slightly generous measure of melted butter, and a slightly sloppy measure of flour. Close wasn’t good enough. While there may be wiggle room with a big batch, you really need to measure carefully for a small one.
I also found that I really wanted buns with those soft sides you can only get when buns cook next to each other. I abandoned the muffin pan in favor of a loaf pan, for at least 4 soft sides. Switching to a loaf pan gave the extra advantage of putting real caramel in the bottom, yielding the gooey outcome I was seeking. I had to borrow a standard loaf pan from Vicki (mine was a bit king-sized — another failed batch), and I had to make two more batches before I got the caramel right, but success was finally mine!
I also had to admit that one cup of flour was going to yield three buns no matter how much I was hoping for only two. Fortunately, the aroma of baking cinnamon buns tends to bring friends drifting into the kitchen.
So here’s my basic recipe. I prefer knots – this dough is too soft for snails. This is a really fun project to do with a nephew or niece or grandchild or borrowed neighbor kid, with plenty of book reading and card playing while things rise and bake. Don’t burn your mouth!
Small Batch Sticky Buns
Ingredients:
For the dough –
- 1/3 cup milk
- 1 Tbsp sugar
- 1 tsp yeast (instant is fine – traditional is fine too)
- 1 cup of flour
- ½ tsp salt
- 1 egg yolk
- 2 Tbsp butter, melted and cooled
- ½ tsp vanilla (optional)
For the caramel:
- 1 Tbsp butter
- 2 Tbsp brown sugar
- 2 Tbsp heavy cream
For assembly:
- 2 Tbsp butter, melted and cooled
- 2 Tbsp brown sugar
- 1 tsp cinnamon


Method:
Heat the milk for about 20 seconds in the microwave. It should be warmer than bath water, but not much warmer. Add the sugar; stir to dissolve.
Add the yeast. Stir to get it wet. Let this mixture sit while you measure out the dry ingredients. At the very least, the yeast will dissolve. At best, it will start to foam, so you know it isn’t dead.


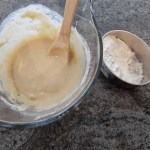
In a bowl, combine HALF THE FLOUR with the salt, egg yolk, vanilla, and yeast mixture.
Stir like crazy. The smoother you get this batter, the less kneading you will have to do. Add the butter and mix some more.
Add the rest of the flour, stirring until everything comes together. Let this nice soft dough sit in the bowl and relax while you wash up a few dishes.

Measure one more tablespoon of flour out onto your counter, and spread it around. Tip your dough onto the flour.
Using a very light touch, knead the dough, incorporating just enough extra flour to keep it from sticking to the counter, until it’s nice and smooth – about 30 strokes or so. It doesn’t take forever, because there is so much goodness (fat) in the dough it doesn’t need much kneading.


Grease a bowl. Put the dough into it, turning to coat the surface. Cover the bowl with plastic wrap. Set it in a warm place to rise until about doubled in volume, which could take half an hour or longer, depending on how warm your kitchen is.
You have an option here, if you’re in a hurry. You can put the dough in a glass bowl (other kinds of microwave-safe ware, like a glazed bowl, may get too hot), covered with plastic wrap, and put it in your microwave on the LOWEST POSSIBLE POWER SETTING for 5 minutes. Once the time is up, let the dough sit in that nice warm environment for another 5 to 10 minutes. By that time, it should have risen enough to proceed.


While your dough is rising, prepare your baking dish. If you make caramel sticky buns in a Texas muffin pan, chances are good that the caramel is going to bubble up and over the sides like mine did, so I don’t recommend that. Grease a loaf pan. Make some caramel as follows:
Melt the butter and sugar together, until boiling all over.
Add the cream. Continue to boil until smooth and thickened, about a minute, stirring all the time.
Pour the caramel into the loaf pan. You can add a layer of nuts, if you like them. I like them.


Divide your risen dough into three equal parts (I measured mine by weight, but you can do it by eye).


Melt the last 2 Tbsp butter into one dish, and mix the cinnamon and sugar in another. Roll each piece of dough into a short, thick rope. Roll the dough in melted butter, and then in the sugar and cinnamon mixture.
Stretching it slightly, tie it into a lovely knot, using exactly the same action you would with a piece of string or a shoelace, stopping short of actually pulling the end through.
Place the rolls side by side in the loaf pan. Drizzle with any leftover melted butter, and sprinkle with any leftover sugar/cinnamon mixture.


Cover with plastic wrap, and set in a warmish place to rise. Once the sugar becomes part of the scene, you can’t use the microwave trick any more, because sugar reacts a little differently to microwaves than plain dough does. Have you ever reheated a Danish in the microwave, only to find the sweet centre lava-hot, and the pastry barely warm? It’s like that.


When your buns are beautifully risen, bake them for 35 – 40 minutes in a preheated 350°F oven, until the tops are crusty and golden brown.
Let the buns sit in their pan for a minute, until the caramel stops bubbling. Run a knife around the pan to make sure the sides aren’t sticking. Carefully turn the buns out onto a rack to cool. Leave the baking dish inverted over the buns for at least 60 seconds, so all the caramel runs from the bottom onto the buns – then carefully lift it off.


Yum! Why would you put frosting on perfection?
Unless you really want to jump-start your next eating plan by burning all the taste receptors in your mouth, wait a minute or two before jumping in there.
Leftovers benefit from a brief visit to the microwave before being consumed. If you’re patient, re-heat a whole bun for 1 minute on half power. If you’re not patient, start with 20 seconds at full power, add 10 more seconds if you need to, then wait 30 seconds for the heat to equalize throughout the bun before applying your chompers. Same total amount of time. I’m just sayin’…
I found a recipe for gluten-free cinnamon buns that I’m going to test-drive over the next few weeks. If it turns out well, I’ll let you know.


Leave A Comment