


As I mentioned in my other “Turkey” posts, I never serve a whole roast “presentation” bird for any reason. Everything on the table cools and congeals while “Papa” or “Mama” carves the turkey, politely inquiring whether the guests prefer dark meat or light. Norman Rockwell-esque though the picture may be, it seems a waste, when you have worked so hard to get everything to the table hot and on time. I take a different approach. I toast the occasion in the kitchen, then serve a buffet of turkey wonderfulness and side dishes, with warmed plates, and encourage everyone to start eating the moment they sit at the table. Second servings stay warm in the kitchen, and everybody’s happy, especially me.
OK, there’s another, more embarrassing reason why I don’t do the presentation bird. For two years in a row, I made my guests wait an extra hour and a half for their turkey, because my perfectly timed and tested bird revealed ruby-red hip joints on the carving board. There was no choice but to put it back in the oven to finish cooking, and serve more wine and hors d’oeuvres (after which no one had any appetite for the bird). Fool me once….
Central to my modern feast is a dish of dark turkey meat that has been braised with whatever flavors occur to me in any given year. One year there was a distinctly Chinese influence, with soy sauce, hoisin, ginger, green onion and hint of citrus flavoring the cornstarch-thickened sauce. As the roast turkey breast was served with traditional dressing and gravy, my guests had two sauces to savor over the course of the meal. It was a hit!
Here is a recipe for braised dark turkey meat that can be flavored any way you want. If you aren’t partial to a “whole bird break-down“, you can buy turkey thighs and/or drumsticks separately from your butcher, a boon to those who prefer the dark part of the bird. Braised turkey is a great multi-tasker – I freeze mine in 1-cup portions for pulled turkey sandwiches, or a nice turkey pot pie. Bear in mind, too, that anything you do to a turkey thigh, you can do to a chicken thigh (as in boneless, skinless, no mess, no problem).
WARNING: Do not braise turkey breasts. They just dry out, even though this is a “wet” cooking method.
Braised Turkey Thighs and Legs
Because turkeys come in all sizes, this is not a precisely-measured recipe: it’s a method.
Ingredients:
Vegetable oil (choose something neutral and good for high temperature cooking, not olive oil)
Turkey thighs, drumsticks, meaty wing parts, any or all (or boneless skinless chicken thighs)
One largish onion, diced, about 2 cups
2 carrots, diced, about 1 cup
2 good-sized celery ribs, diced, about 1 cup
Garlic, smashed (optional, and as much as you want)
Turkey stock (which could be chicken broth, or even vegetable stock), 1 litre or more


Optional flavoring ingredients – choose anything from the traditional poultry blend of herbs (thyme, rosemary, sage), to hot sauce.
If you want a specific flavor profile for the whole batch, this is the place to implement it. For Turkey Tetrazzini, you might use white wine, oregano, and paprika. Google a bunch of recipes for inspiration. I keep back issues of Christmas food magazines, in case I forget a good idea I encountered some time ago.
If you are making a big batch with plans for frozen single servings, leave the distinctive ingredients out now, and make “Plain Jane” braised turkey. Those special flavors can be added later. You can have six different dinners from one batch of basic turkey.

Mushrooms, if you happen to have them, always add nice flavor. Green peppers, not so much. If you have tomatoes to spare, they bring natural glutamates to the broth. If you traveled to Japan this year (that would be me) you can add a piece or two of rinsed Kombu (seaweed), which will act as a flavor enhancer.
Method:
I prepare my braised turkey in a deep frying pan with a cover – one pan, less washing later. You can use a dutch oven, or a nice heavy casserole, a small roasting pan or a pyrex baking dish.
Lightly season the turkey pieces with salt and pepper.
To start, heat a large, heavy-bottomed frying pan over medium-high heat. Add the oil and let it get good and hot. Add the turkey pieces in a single layer. Work in batches if you have to — no stacking, please.
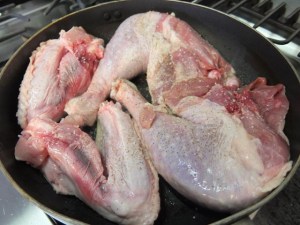
Brown the turkey parts. Let them sit for at least 2 minutes on each side, or as long as it takes to develop nice browning. This will translate into excellent flavor as cooking progresses. The pieces in my photo need more time — I think I probably turned them a few times. There is no “one turn only” rule for browning — not with this dish or any other. OK, well, maybe for “over easy” eggs…
If you’re using some kind of casserole or baking dish to braise your turkey, move the browned pieces to it, but don’t wash the frying pan just yet.

Add the vegetables to the braising dish.

This is the place to add your specific flavoring ingredients, if you’re using them.
All the supermarkets near me carry a fresh-herb package called “Poultry Blend”, containing enough sage, rosemary and thyme to pop into the cavity of a roasting chicken or small turkey, but about three times as much as you need to flavor the quantity of turkey I’m showing in these photos. From one package of herbs I used a third to season my turkey stock, some to season this dish, and some to add to the brine for the turkey breast. Dried whole-leaf herbs work perfectly well when braising — there is plenty of time for them to re-hydrate and contribute their flavors. That ever-so-handy container of “Poultry Seasoning” contains very finely ground herbs, and if you bought it last year, it likely has very little flavor left now. If it’s fresh, add it sparingly – you can’t take it back once it’s in the pot.
Just for variety, I added just a little barbecue sauce to this batch.

Add turkey (or other) stock to half-cover the turkey pieces. If you have to move the pieces to another dish for braising, bring the stock to a simmer in the frying pan before you add it to your dish. This serves two purposes — it dissolves the browned bits (the fond) from the frying pan, which is extra flavor, and it warms up the stock, which is a good thing.
If you cover the turkey with stock completely, you’re making stew. If you only cover it half-way, you’re braising. Half-way is what you want.

Cover tightly. If you don’t have a lid, use a double-thickness of foil, and crimp it well around the edges of the braising pan or dish.

Transfer the covered dish to a pre-heated 300°F oven.

Cooking time will vary, but 2 ½ hours is usual for turkey parts. At 2 hours, check to see if a fork twisted in the meat results in easy shredding. Check every 15 minutes after that until the fork test is positive, and the meat is falling off the bones. Do not over-cook, or the meat will be dry. Really. After a certain point, the juices in the meat can be drawn out into the braising liquid.
If you’re using boneless, skinless chicken thighs, start checking much earlier – perhaps at the one-hour mark. If the meat is still resistant to the fork test, keep cooking, but check every 10 minutes or so.
Allow the meat to cool, uncovered, in its liquid for 30 minutes to an hour. You want the pieces to be cool enough to handle, but still warm enough to shred easily.

Remove the meat from the bones using whatever implement you have – fork, tongs, fingers. Discard bones, skin, and connective tissue as you go. Don’t save them for stock — they have already given up most of their flavor, which is now in the braising liquid.
You can leave the meat in big chunks, but I prefer to shred it, either by hand or with a couple of forks, and I often chop the long shreds a couple of times for easier eating later.

Strain all the solids out of the braising liquid.
No matter what I’m doing next, whether it’s making the “Turkey Feast” big dish, or packinging the shredded turkey into single servings, there’s always more braising liquid than I need. I de-fat it by refrigerating it until the fat solidifies on the top (which I then remove and discard), and portion it for freezing so I don’t EVER have to use packaged, powdered, or canned mixes to make gravy or stir-fry sauce. Take that, pre-fab gravy-sauce industry!


If you don’t have time to wait for the refrigeration method of de-fatting, you can skim as much fat as possible off the surface of the hot braising liquid with a spoon, after you have strained it and allowed it sit for 5 minutes or so. I have invested in one of those fat-separator cups that allow you to pour off most of the liquid, leaving the fat in the cup — it’s a good tool if you have the space to store it.
Just a reminder –You have NOT seasoned your braised turkey with salt or pepper since browning the turkey pieces, although you may have added some salty ingredients (like that barbecue sauce). Whatever dish you make with your braised turkey as you proceed, taste and season as you go. I can’t stress enough how important it is to taste your food. If it’s tasting boring or flat, a little sprinkle of salt or a dash of soy sauce can make all the difference.
For my make-ahead turkey feast, I add a lot of the braising liquid back to the turkey meat, simmering it with additional vegetables, spices and herbs just until the vegetables are tender. Then I thicken the sauce with my choice of cornstarch, arrowroot, potato starch, or rice flour made into a slurry with water, or a nice browned roux (for quantities, see “No Bird Gravy”). Finally, I taste and adjust the seasoning with salt and pepper. I finish the dish as early as two days before the event, and it sits politely in my second fridge, awaiting re-heating on the big day. Big check-mark on my “to do” list.
If I am doing a big-batch of braised turkey for storage, I like to put my shreds (no added salt or pepper at this point) into a 9 x 13″ pyrex baking dish and add just enough strained braising liquid to cover. I pop it in the fridge overnight. The braising liquid is full of gelatin from the skin and connective tissue of the turkey parts, so it will set-up quite solidly at refrigerator temperature. By morning, I can cut the contents of the pan into neat portions for freezing. The braising “jelly”will re-liquify when I re-heat the turkey, and I can flavor and thicken it to suit whatever dish I have in mind.


Braised dark turkey makes excellent pot pie. Heat it up, season with salt and pepper, and thicken the braising liquid with a slurry of cornstarch, rice flour, or potato starch (1 tsp whatever in 2 tsp water – add just enough to thicken, which may not be all of it). Add some frozen vegetables and top with mashed
potato, or drop-biscuit dough, and bake up a hearty late-winter meal.


You can use that same mixture to top a baked potato. For a change, skip the mixed veggies and substitute mushrooms.
I added some yogurt to this one for “Turkey Stroganoff”.

Here’s a way to make pulled barbecue turkey on a bun, with no barbecue required. Re-heat some braised turkey until the braising liquid reduces to almost nothing. Add your favorite barbecue sauce. Pile the saucy shredded meat on a bun – remember to taste it to see if it needs additional seasoning. Top with
cole slaw, add a pickle if you want, and enjoy. Yee haw!

You could stir-fry some vegetables, and add a portion of braised turkey for the protein and liquid. Thicken with a little cornstarch slurry, or rice flour.

Some people (that would be my youngest son) just heat their braised turkey and eat it as it is, or more likely with a big glug of his current favorite sauce. Of course, he’s all about the protein, so I guess we can make allowances.
Mushrooms, if you happen to have them, always add nice flavor. Green peppers, not so much. If you have tomatoes to spare, they bring natural glutamates to the broth. If you traveled to Japan this year (that would be me) you can add a piece or two of rinsed Kombu (seaweed), which will act as a flavor enhancer.


Leave A Comment